Pizza Dough Hydration Explained: Tips For a Satisfied Pizza
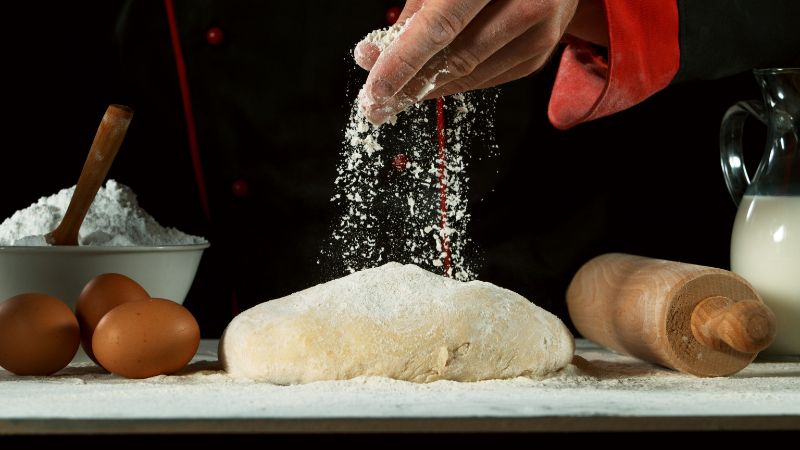

Pizza dough hydration is a key factor in creating the perfect crust. It refers to the amount of water in the dough compared to the flour. This ratio affects the texture, flavor, and baking properties of the final pizza.
Mastering dough hydration takes practice and experimentation. This skill can elevate homemade pizzas to a new level.
Why Does Pizza Dough Needs Water?
First of all, water can activate the glutenin and gliadin in flour, allowing them to form gluten networks. This gives the dough its structure, elasticity, and ability to trap gas bubbles, resulting in a chewy texture.
Moreover, yeast needs moisture to work. Water dissolves sugars in the flour, making them available for the yeast to feed on and produce carbon dioxide, which causes the dough to rise.
More water makes the dough stretchier and also helps create steam during baking, which typically results in a lighter, airier crust with larger air pockets, while on the contrast less water produces a denser, crispier crust.
What is The Hydration Ratio?

The hydration ratio is the amount of water compared to flour in the dough.
When cooking pizza, flour is always considered 100%, and other ingredients are expressed as a percentage of the flour weight. This makes it easy to scale recipes up or down.
For example, 60% hydration means 60 grams of water for every 100 grams of flour.
Generally, people classify different hydration ratios into four levels: low, medium, high, and very high. Bakers adjust the hydration based on their desired pizza texture and the type of flour used.
- Low hydration doughs(50-57%) are firmer and easier to shape. They make denser crumb structures with smaller air bubbles. Always have crispier crusts.
- Medium hydration doughs(58-65%) are easy for beginners to cook, but it require more work when stretching.
- High hydration doughs(65-75%) are wetter and stickier. They create airier crusts with bigger bubbles. They require quick action when shaping. Always taste more light, soft, and airy crust.
- Very high hydration doughs(75-80%) are extremely wet and need specific baking techniques.
Different Hydration Ratios of Pizzas:
|
Pizza Style |
Hydration Range |
Typical Hydration |
Crust Characteristics |
|
Neapolitan-style |
55-65% |
60-65% |
Soft, elastic, puffy rim |
|
New York-style |
58-65% |
62% |
Thin, foldable, slight chew |
|
Sicilian-style |
50-57% |
55% |
Dense, firm |
|
Detroit-style |
70-80% |
75% |
Light, airy, crispy exterior |
|
Chicago Deep-dish |
58-62% |
60% |
Firm, sturdy for heavy toppings |
|
Roman-style (al Taglio) |
70-80% |
75% |
Light, airy, crispy base |
|
Focaccia-style |
80%+ |
85% |
Very soft, open crumb structure |
How to Work Out Pizza Hydration?
Flour Types and Their Impact on Hydration
Different flours absorb water differently. This changes how much water you need.
Whole wheat flour boosts nutrition and adds a nutty flavor to pizza dough. It absorbs more water than all-purpose flour, so bakers may need to increase hydration.
Spelt flour offers a slightly sweet, complex flavor. It's more water-soluble than wheat, requiring less hydration.
Italian "00" flour is very finely ground. It typically needs less water than coarser flours.
Some recipes mix flour types. This can change water absorption. You might need to adjust hydration when switching flours. So, always check your dough's feel and add water slowly if it seems too dry.
Semolina adds a golden color and slight crunch to crusts. It's often used in small amounts (25-50%) mixed with other flours.
Rye flour brings a rich, earthy taste but can make dough sticky. A small amount (10-20%) works well in blends.
Gluten-free options like rice or almond flour need different techniques. They typically require more water and binding agents like xanthan gum.
Here is a chart for you to take a reference:
|
Flour Type |
Typical Protein Content |
Typical Hydration Range |
|
All-purpose |
10-12% |
60-65% |
|
Bread flour |
11-13% |
65-70% |
|
Whole wheat |
13-14% |
70-80% |
|
Rye flour |
9-12% |
80-100% |
|
Spelt flour |
10-11% |
65-75% |
|
High-gluten |
14%+ |
70-85% |
|
Pastry flour |
8-9% |
55-60% |

Adjusting Hydration for Ambient Conditions
Humidity and temperature affect dough hydration. In dry climates, increase water slightly. In humid areas, reduce it.
Hot weather tips:
- Use cold water
- Lower hydration by 2-3%
- Reduce yeast slightly
Cold weather tips:
- Use warm water
- Increase hydration by 2-3%
- Add a bit more yeast
Check dough consistency while mixing. It should be tacky but not sticky. Add small amounts of flour or water as needed to get the right feel.
Techniques for Mixing and Kneading High-Hydration Dough
High-hydration doughs (70%+) are tricky to work with but produce amazing pizza. Try these tips:
- Use a stand mixer with a dough hook for the easiest mixing
- Start with 75% of water, add rest slowly
- Mix on low speed until ingredients combine
- Increase to medium, and mix 5-7 minutes until smooth
- Let dough rest for 20 minutes before kneading
For hand mixing:
- Use a large bowl
- Mix with a wooden spoon
- Fold the dough onto itself instead of kneading
- Use wet hands to prevent sticking
High-hydration doughs need gentle handling. Avoid overworking. Let dough rest between steps for best results.
Baking Considerations
Pizza dough hydration affects how the crust bakes and the final texture. The amount of water in the dough impacts oven spring and baking times.
Oven Spring and Moisture Retention
Higher hydration doughs tend to have better oven spring. This results in a lighter, airier crust. The extra moisture turns to steam in the hot oven, helping the dough expand quickly.
Wetter doughs also retain more moisture during baking. This leads to a softer, chewier interior texture. The crust may stay tender for longer after baking.
Lower hydration doughs can produce a crispier exterior. They may dry out faster in the oven. This creates a crunchier crust but potentially a drier interior.
Modifying Baking Times and Temperatures
For different hydration levels of pizza dough, you need to adjust baking time when you cook.
Higher hydration doughs may require longer bake times. This allows the extra moisture to evaporate.
Lower temperatures can help prevent over-browning of wetter doughs. A good starting point is 450°F (230°C) for high hydration pizzas.
Drier doughs can handle higher heat, around 500°F (260°C). They may need shorter bake times to avoid drying out too much.
You can use a pizza stone or steel helps with moisture control. These tools absorb excess moisture from the dough bottom.
Common Hydration Issues and How to Fix Them
Sticky dough often means too much water. Add small amounts of flour until the dough feels right. The dry, crumbly dough needs more water. Add a little at a time and knead well.
Uneven mixing can cause dry and wet spots. Knead the dough longer to fix this. If the dough tears easily, it may be too dry. Add water slowly and work it in.
Common signs of hydration issues:
- Too wet: Dough sticks to hands and surfaces
- Too dry: Dough feels stiff and cracks
- Just right: Dough is smooth and elastic
Frequently Asked Questions
How do you adjust pizza dough hydration for home oven baking?
Home ovens often can't reach the high temperatures of professional pizza ovens. To compensate, slightly lower the hydration. This helps prevent a soggy crust. Aim for 58-62% hydration for most home oven pizzas. Use a pizza stone or steel to improve heat retention and crust crispiness.
What should you do if your pizza dough becomes overly hydrated?
If dough becomes too wet, there are a few fixes:
- Add small amounts of flour during kneading
- Let the dough rest in the fridge to firm up
- Use more flour when shaping the pizza
Avoid adding too much extra flour, as it can throw off the recipe's balance. With practice, bakers learn to judge dough consistency by feel.





 Aluminum Dining Table
 WPC Dining Table
 HDPE Dining Table
 Cart
Cart
 Gas Burner
 Hat
Hat
 Apron
Apron
 Swivel Rocker Set
 Textilene Chairs
 HDPE Chairs
 Wicker Counter Height Barstools
 Metal Counter Height Barstools


